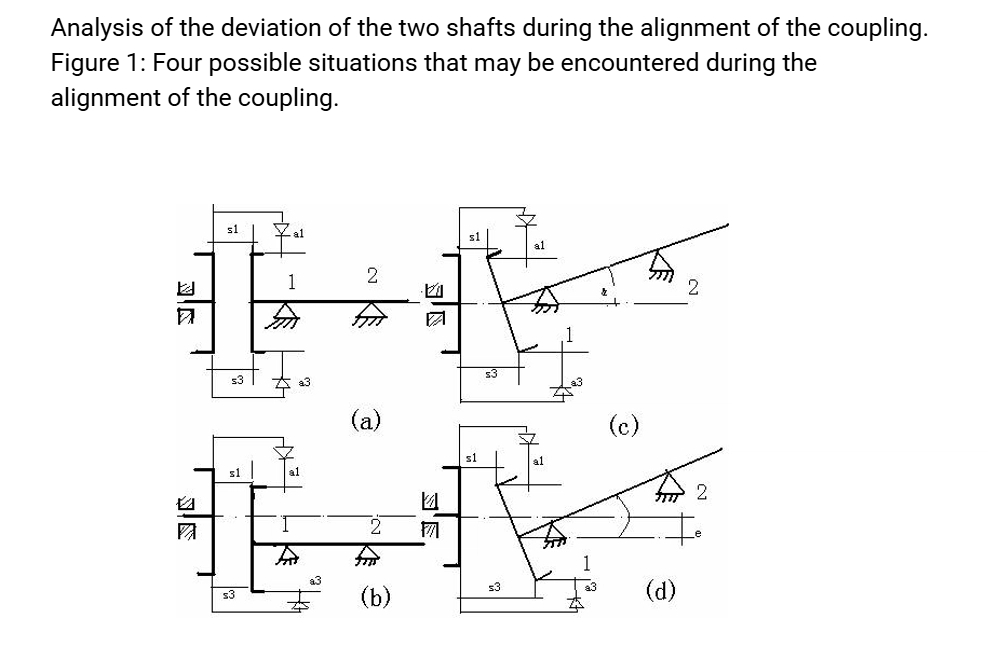
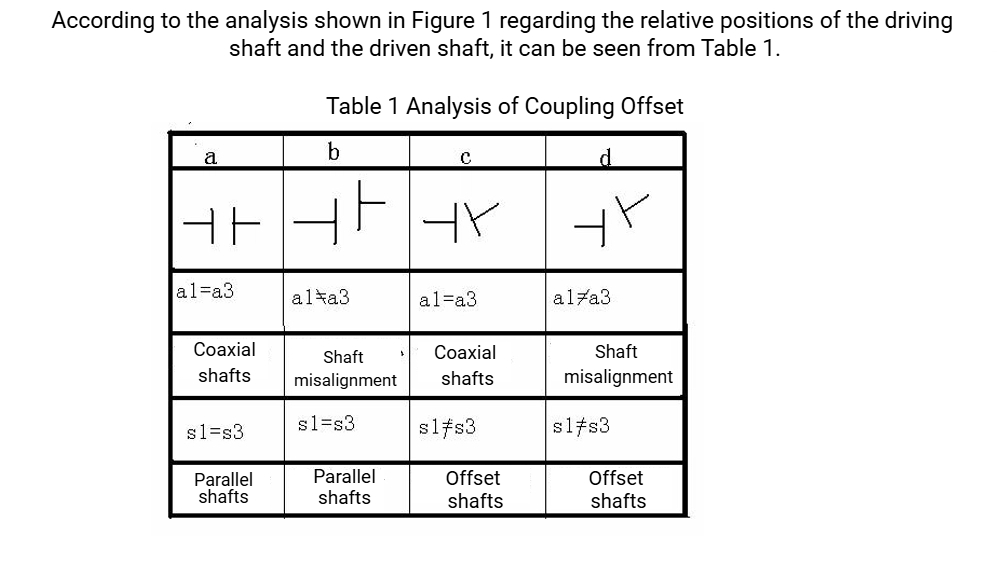
1.Coupling alignment is a critical task in machinery installation. The purpose of alignment is to ensure that the centerlines of the drive shaft and driven shaft are collinear during operation. Alignment accuracy directly affects whether the machine can function properly, especially for high-speed equipment.
Achieving perfect coaxiality between two shafts is difficult, and maintaining precise alignment in continuously operating machinery is even more challenging. Factors such as uneven thermal expansion of components, shaft deflection, uneven bearing wear, machine displacement, and uneven foundation settlement can all contribute to misalignment. Therefore, during the design phase, an allowable deviation between the two shaft centerlines is specified, which must also be adhered to during coupling installation.
From an assembly perspective, a larger permissible deviation simplifies installation, as long as the coupling can reliably transmit torque. However, from an installation quality standpoint, a smaller deviation between shaft centerlines results in more precise alignment, better operational performance, and longer service life of the machinery. Thus, the allowable misalignment during coupling installation should not be misinterpreted as a margin for sloppy workmanship.

2. Measurement Methods
During machinery installation, coupling alignment is typically performed after the main unit’s center is fixed and leveled. Measurements and calculations are conducted to analyze deviation, and the driver shaft’s position is adjusted to achieve both coaxiality and parallelism between the drive and driven shafts.
Various methods exist for coupling alignment, with commonly used techniques including:
A simple measurement method is illustrated in Figure 2. A square ruler and feeler gauge are used to measure radial misalignment at various positions on the coupling’s outer circumference, while a feeler gauge measures the axial gap deviation between the two coupling halves. Through analysis and adjustment, shaft alignment is achieved. This method is straightforward but offers limited accuracy, resulting in significant alignment error. It is only suitable for couplings used in low-speed machinery with minimal alignment requirements.

